Gestionar las asignaciones del plan de trabajo
- Genesys Cloud CX 3, Genesys Cloud CX 4, Genesys Cloud CX 1 WEM Add-on II, Genesys Cloud CX 2 WEM Add-on I o licencia Genesys Cloud EX
- Gestión del personal > Plan de trabajo > Ver permisos
- Gestión de personal > Unidad de negocio > Ver permisos
- Gestión de personal > Unidad de gestión > Ver permisos
- Gestión de personal > Agente > Ver permisos
- Grupos > Equipo de trabajo > Ver permisos
Puede realizar las siguientes acciones desde la página Asignaciones del plan de trabajo. Haga clic en cada opción para leer sobre las acciones que puede realizar en esta página.
Para ver los detalles de la asignación del plan de trabajo del agente, realice los siguientes pasos:
- Hacer clic Administración.
- En Workforce Management, haga clic en Work Plan Assignments.
- Haga clic en Menu > Workforce Management > Work Plan Configuration > Work Plan Changes.
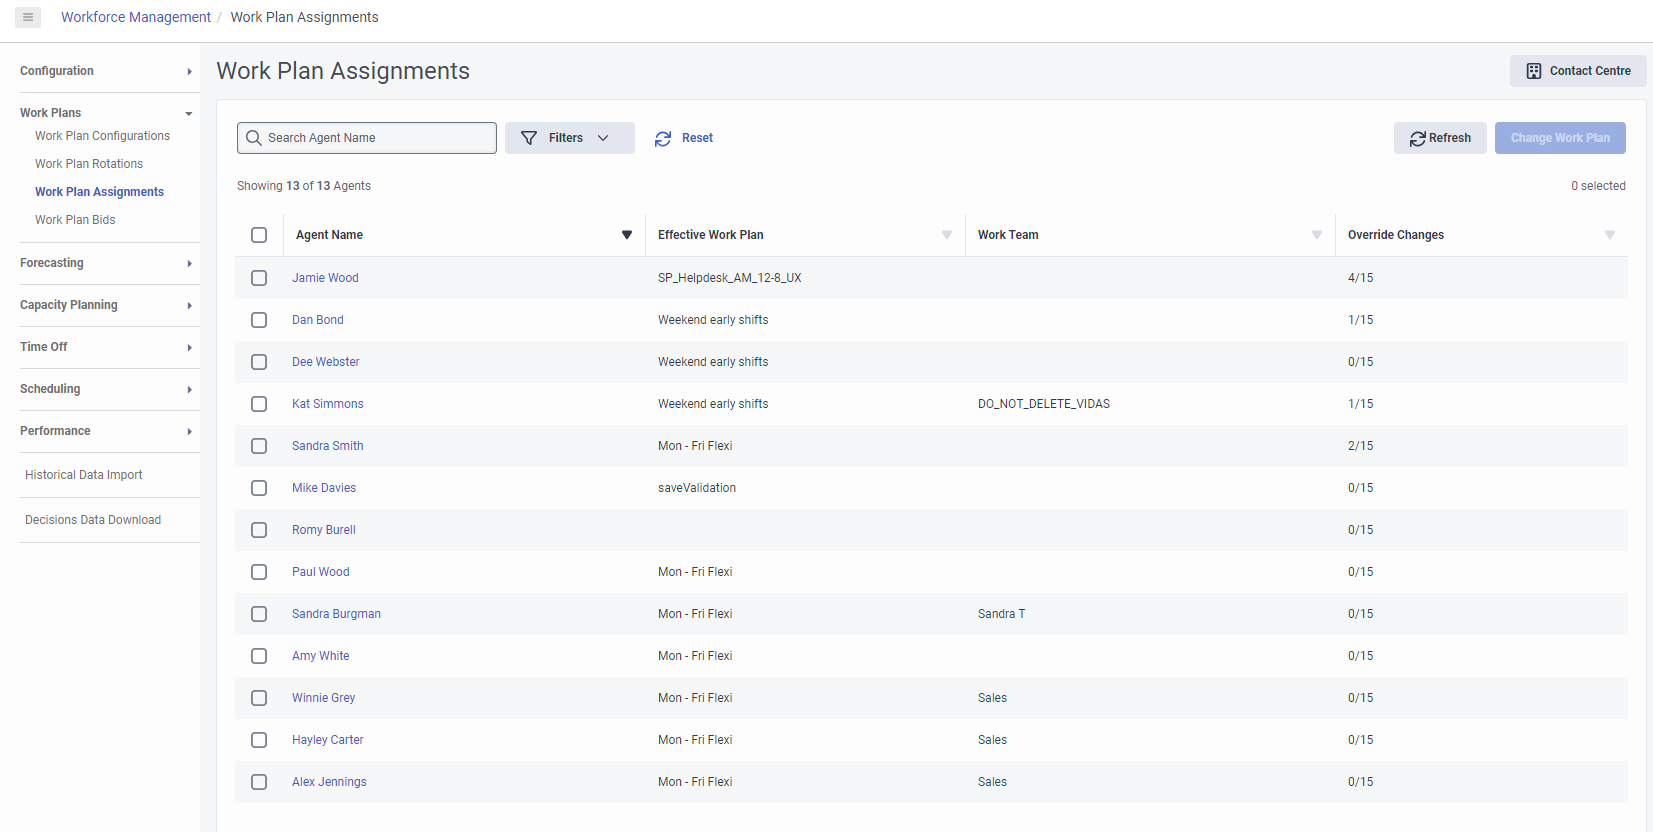
- En la lista Unidad de Negocio/Unidad de Gestión de la esquina superior derecha, seleccione la unidad de negocio/unidad de gestión. Aparecerá la página Asignaciones del plan de trabajo.
Puede ver la lista de agentes disponibles bajo la unidad de gestión junto con detalles como, plan de trabajo efectivo, equipo de trabajo y detalles de anulación. 
Para cambiar el plan de trabajo de un agente, realice los siguientes pasos:
- Navegue hasta la página Asignaciones del plan de trabajo.
- Navegue hasta la página Cambios en el plan de trabajo.
- Para seleccionar el agente cuyo plan de trabajo requiere cambios, haga clic en la casilla situada junto al agente. Puede seleccionar varios agentes si es necesario asignarlos todos al mismo plan de trabajo.
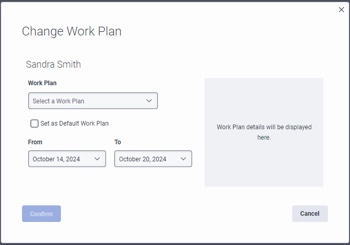
- Haga clic en Cambiar plan de trabajo. Aparecerá el cuadro de diálogo Modificar plan de trabajo.

- En el campo Plan de trabajo, seleccione el nuevo plan de trabajo.
- Seleccione las opciones necesarias en los campos que se muestran.
- Para cambiar el plan de trabajo de un único agente, siga estos pasos:
- Marque la casilla Establecer como plan de trabajo predeterminado si desea que el plan de trabajo seleccionado sea el plan de trabajo predeterminado. Se crea una nueva asignación de plan de trabajo con una fecha de finalización abierta.
- En el campo Desde, seleccione si desea iniciar el plan de trabajo inmediatamente o a partir de un día concreto. Nota: Este campo sólo se muestra cuando se marca la casilla de verificación Establecer como plan de trabajo predeterminado.
- Para crear una modificación temporal del plan de trabajo para un único agente, siga estos pasos:
- En el campo Desde, seleccione la fecha para indicar la fecha de inicio del plan de trabajo.
- En el campo To, seleccione la fecha para indicar la fecha de finalización del plan de trabajo.
- Para cambiar el plan de trabajo de varios agentes, siga estos pasos:
- En el campo Desde, seleccione si desea iniciar el plan de trabajo inmediatamente o a partir de un día concreto.
- Para cambiar el plan de trabajo de un único agente, siga estos pasos:
- La sección de la derecha muestra el plan de trabajo de toda la semana para el periodo siguiente.
- Haga clic en Confirmar para confirmar los cambios. El plan de trabajo actualizado se muestra en la página Asignaciones del plan de trabajo.
Para eliminar un plan de trabajo, realice los siguientes pasos:
- Navegue hasta la página Asignaciones del plan de trabajo.
- Navegue hasta la página Cambios en el plan de trabajo.
- Haga clic en el agente cuyo plan de trabajo desea eliminar.
- En la página Asignaciones del plan de trabajo del agente, seleccione el plan de trabajo.
- Haga clic en Borrar. Aparece el cuadro de diálogo Eliminar asignación.
- Haga clic en Sí, eliminar asignación para confirmar la eliminación.


